Add a Guest Consent Policy
The Guest Consent Policy tab allows a guest to decide and consent to a property regarding whether their data can be retained at the property and the duration until they can retain their details.
Perform the following steps to create a guest consent policy:
Navigate to Settings ➜ All Settings ➜ Data Retention Management (under General). The Data Retention Management page is displayed.
Navigate to Guest Consent Policy in the Retention Policy tab to set the policy for the retention of a guest's data.
Click Add. The Add Guest Consent Policy page appears.
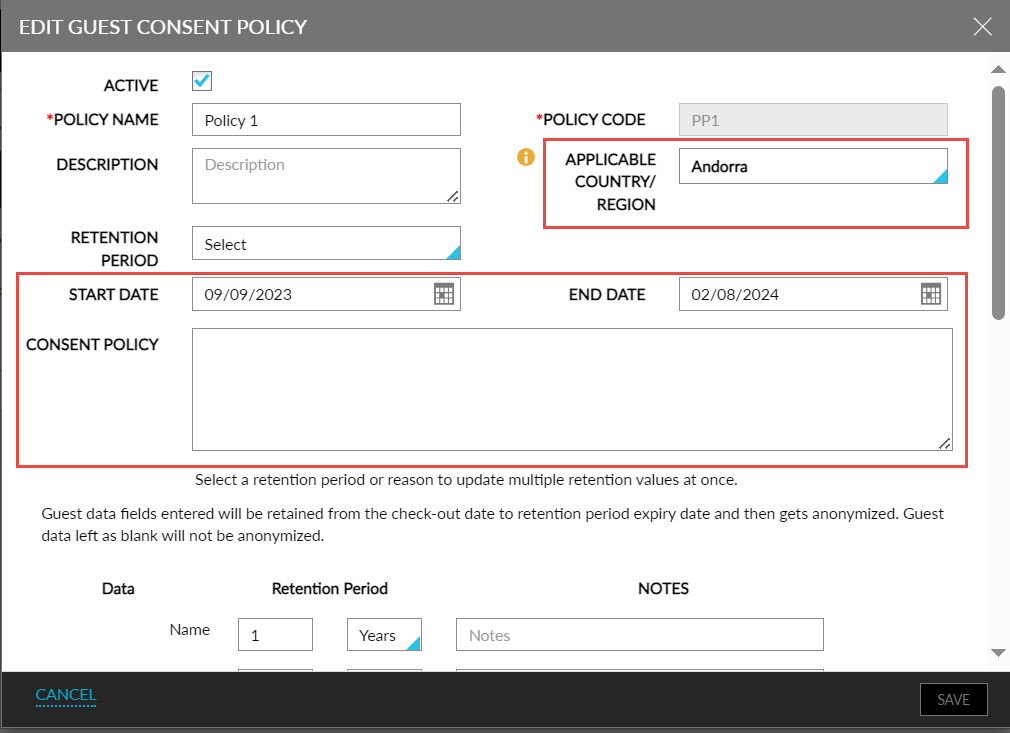
Refer to the following table and fill in the fields to add a guest consent policy:
|
Field |
Description |
|---|---|
|
Active |
The guest consent policy will be available if enabled. |
|
Policy Name |
The relevant policy name for the guest consent policy. |
|
Policy Code |
A unique code to identify the policy. |
|
Description |
The brief description of the policy. |
|
Retention Period |
Select a Retention Period and click Apply to All, to update multiple retention values at once. |
|
Applicable Country/Region |
Select the country/region for the Guest Consent Policy. |
|
Start Date |
Select the start date for the policy. |
|
End Date |
Select the end date for the policy. |
|
Consent Policy |
Enter the description for the policy. |
Data fields entered will be retained from the checkout date to the expiry date of the Retention Period. After this the data gets anonymized. Guest data left blank will not be anonymized.
Click Save. The Guest Consent Policy is now successfully added.
Guest profiles can have one or more consent policies applied. So, there is a possibility of having different retention periods for same data fields. In such a scenario, the longer retention period is taken to consideration while anonymizing data.